By Widhibek
Published September 2, 2020 | Adapted for NightSkyIndonesia.com
“Is the location busy?” I asked, wanting to make sure our Milky Way shoot at Krisak Bridge wouldn’t be interrupted by lots of passing motorcycles. “It’s quiet, I was there recently,” replied Dwi “Kebo.” Perfect! We planned a Milky Way hunt there soon.
For mid-August, the Milky Way is visible from sunset up to midnight, so no need for all-nighters. We could leave in the afternoon and return by 9-10 PM. Luckily, it was near the new moon, minimizing moonlight interference.
Equipment Preparation
Earlier that day, I packed my gear: two camera bodies (Canon EOS R and 6D), lenses including Samyang 14mm f/2.8, Canon 16-35mm f/4, Sigma 35mm f/1.4, and Canon 70-200mm f/4 telephoto just in case we needed to shoot deep sky objects (DSO). I also recharged my Theta 360 camera and checked its storage.
I brought my Sky Adventure star tracker for exposures longer than 30 seconds to counter earth’s rotation—allowing longer shutter speeds without star trails. Two tripods—one with the tracker, the other for regular shooting—were ready. I packed a phone mount for potential phone astrophotography.
Charged camera batteries, AA batteries (for flash, tracker, headlamp), shutter release cables, and cleared memory cards rounded out the prep.
For more on landscape gear, see my landscape photography gear article.
Planning
Krisak Bridge faces north-south, making it a great foreground subject for Milky Way photos. Dwi “Kebo” had scouted the area, helping us figure out the best shooting position.
Google Maps revealed multiple names for the bridge: Selfie Bridge, JLK Bridge, Red Bridge, Nusantara Bridge, Serut Bridge—quite confusing!
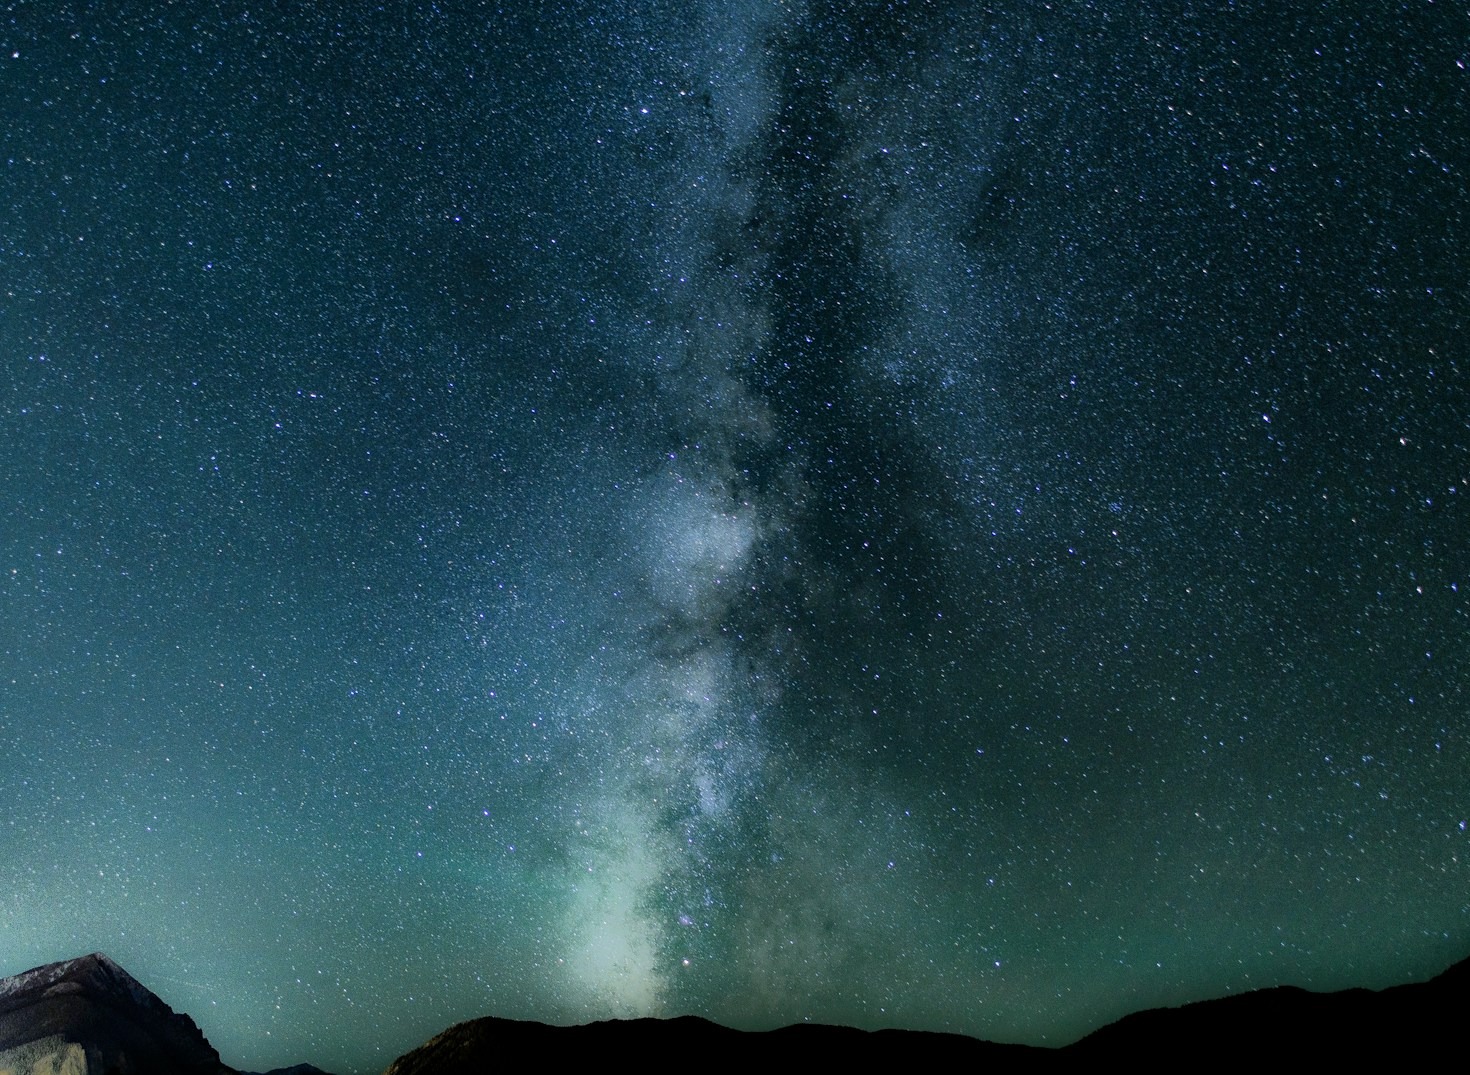
Using Stellarium, one of my favorite apps for Milky Way timing, I confirmed that the Milky Way would be nearly vertical after sunset. This meant our camera should shoot vertically with a wide lens to include both Krisak Bridge and the soaring Milky Way background.
Plans vs Reality
We planned to leave Solo by 4 PM but only hit the road at 6 PM along Sukoharjo – Wonogiri. The journey went smoothly. Several roadside warungs were still open at night. The bridge was dark—no lighting that night due to a power issue. Fortunately, this prevented light leaks in our 20-second exposures.
Milky Way Position
The Milky Way spanned nearly 70 degrees—perfect for vertical framing to capture the core arc. Some passing vehicles caused overexposure on frames, but traffic was minimal overall.
Portrait Shooting
Many friends love changing profile pictures during these hunts! Icuk even rode from Solo with his scooter to join.
After testing shots, Icuk posed by the bridge, with Suryo directing smartphone light as auxiliary fill. Twenty-second exposures sometimes needed retakes due to passing motorcycles flooding the frame with light.
Roles switched—Suryo became the model, and Icuk the light assistant. Teamwork was essential for good results.
Changing Positions
After sufficient shots by the bridge, we moved to the east side below. From there, the bridge framed as Milky Way’s foreground. Kit lens users had to move further back to fit both vertical Milky Way and bridge in one frame.
Milky Way Panorama
When the entire Milky Way couldn’t fit in one frame, we made panoramas: one frame for the bridge, one or two for the Milky Way.
Remember:
- 30% overlap between frames aids stitching.
- Keep manual exposure and focus consistent to avoid mismatched light levels in the final panorama.
Difficulties on Location
Unfortunately, as we took some frames from Krisak Bridge’s side, white clouds drifted westward, eventually obscuring the sky. The Milky Way peeked briefly but mostly vanished. I kept the camera rolling on a shutter release for a timelapse of clouds and the fleeting Milky Way moments.
Enjoying Nature Together
Marsono, not photographing, cooked meals. Warm coffee was soon distributed among us hunters. The smell of toasted chocolate bread filled the air as we awaited clearing skies. Sharing stories by the firelight became one of the evening’s memorable moments.
Group Photo and Wrap-Up
After a while, sensing the clouds wouldn’t clear soon, we ended the hunt with a group photo by the bridge. Twenty seconds felt long; many shots were blurry due to shaking. Clearly, easier to be behind the camera than pose!
Krisak Bridge 360° Milky Way Panorama
Explore with 360° interactive view.
When’s the Next Hunt?
Not sure yet—the COVID-19 pandemic shows no clear end. We continue to follow safety protocols: masks, distancing, and minimizing outside activities. August’s Milky Way season ends soon, and recent cloudy weather complicates things. We hope for more starry nights ahead.
Milky Way Camera Settings
Typically, I set:
- Lens aperture wide open
- Shutter speed 15-30 seconds
- ISO 1600-6400
Settings depend on site darkness and light pollution—darker spots allow ISO 6400; brighter areas use ISO 1600. Manual focus, assisted by live view zoom on bright stars, ensures sharpness.
Best Time to Shoot
Milky Way is visible mid-February to mid-October, with June–August optimal for long night viewing (sunset to before dawn). Detailed shooting info is on page 38 of my book Memotret Milky Way.
Post-Processing Milky Way Photos
I shoot RAW for flexibility; RAW maintains more data than compressed JPEGs. In one photo with no vehicles, a passing motorcycle caused overexposure during a 20-second exposure. Using Adobe Bridge, I adjusted highlights, shadows, and white balance for desired results.
This detailed experience highlights practical field tips, teamwork importance, the unpredictable nature of outdoor astrophotography, and the joy of seeking Indonesia’s celestial beauty with friends. NightSkyIndonesia.com welcomes you to join future hunts and learn more about night sky shooting.
Leave a Reply